
Setting Up Pi-hole and Nginx Reverse Proxy Manager for Ad Blocking and Custom Local Domains
One of my go-to software packages to install on any home lab setup is Pi-hole. I use it for two main purposes. First, it blocks ads and tracking domains for all devices on your local network. This makes browsing the internet on your devices more enjoyable and secure while reducing data usage. Second, I use it to set up custom local domains for other software that runs on my home lab.
How Does This Work?
Pi-hole is a DNS server that translates human-friendly domain names (like www.example.com) into machine-readable IP addresses (like 192.0.2.1). Every day, your devices use common DNS servers like Google (8.8.8.8) and Cloudflare (1.1.1.1). Instead of your devices connecting directly to one of these DNS servers, they connect to Pi-hole to resolve domains. Pi-hole can then block any domains on its block list and resolve DNS using one of the common public DNS servers mentioned before. Pi-hole also lets you define local DNS records, allowing you to add custom domains that will only resolve on your local network.
Installing Pi-hole
First, you will need to install Pi-hole. This can be done with the one-line automated installer: curl -sSL https://install.pi-hole.net | bash. Just follow the prompts.
After installing and running Pi-hole, you need your devices to use it as their DNS server. This is simple, but there are several different ways to achieve this. Read more here to figure out what works best for you.
Accessing the Web UI
After successfully installing Pi-hole, you should be able to access the web UI on your local network. You can access the web UI by typing your server's local IP in your browser. You should now see a dashboard looking something like this:
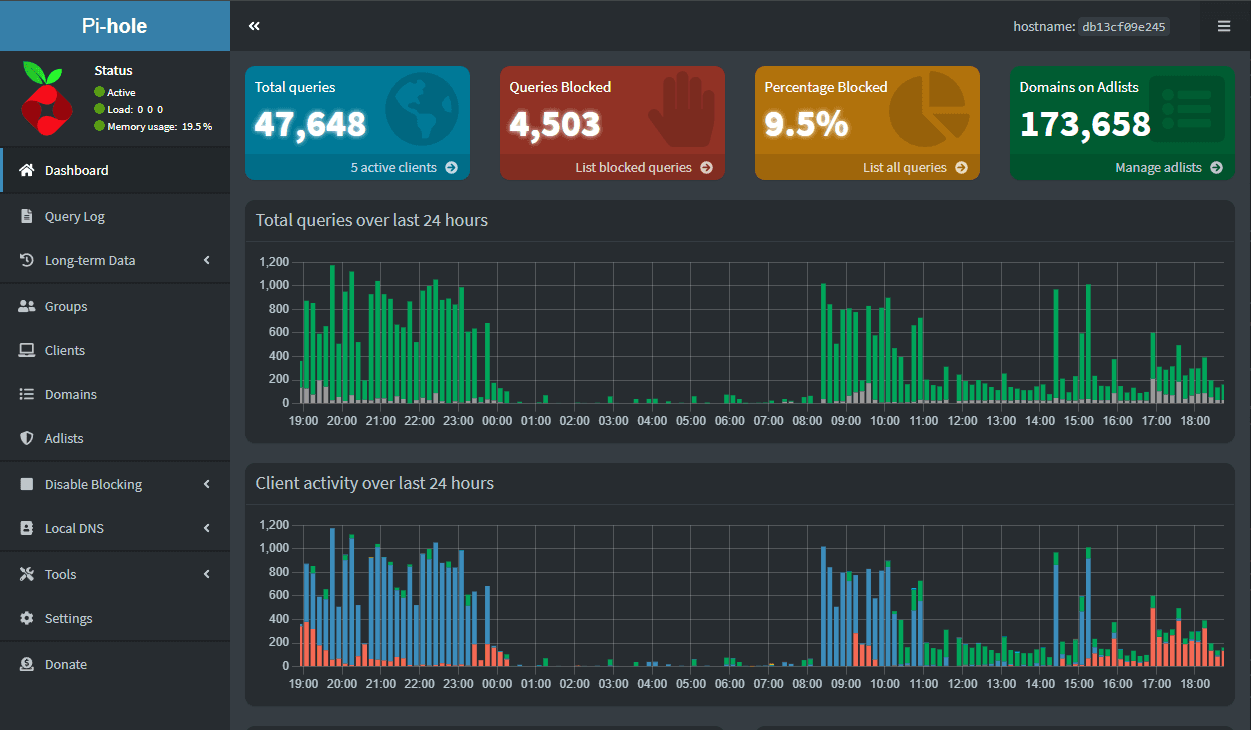
Here, you can see how many domains have been resolved and how many of them have been blocked. If you are not interested in setting up local domains, congrats, you are done! You can now browse the internet more enjoyably.
Custom Domains with Nginx Proxy Manager
Nginx Proxy Manager is a web-based application that provides an easy-to-use interface for managing Nginx reverse proxy configurations. It simplifies the process of setting up and configuring reverse proxies for your local services. When you have multiple local services running on different ports or servers, accessing them can be cumbersome. You typically need to remember the IP addresses and port numbers for each service. This is where Nginx Proxy Manager comes in handy, especially when combined with custom local domains.
- Install Nginx Proxy Manager. I like to use Docker to set this up easily. Read here for instructions.
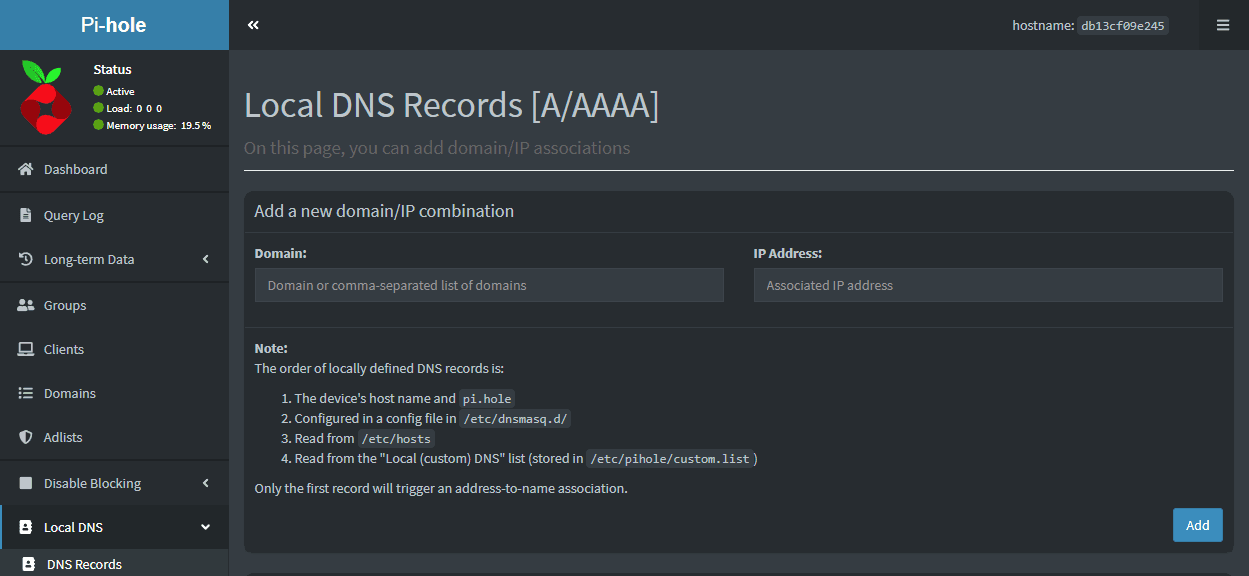
- Click on "Local DNS" > "DNS records" on the Pi-hole web UI.
- Add the name of the custom domain you want to use and the IP of your Nginx Proxy Manager instance.
- Open the web UI for Nginx Proxy Manager. Add a new proxy host with the domain you used in step 3 and the IP and port that the service is running on.
That's it! Now you no longer need to remember any IPs or ports to access web services on your network. On top of that, ads are now blocked at the network level, providing a better browsing experience on your network!