
Creating Your Own Home Server With Virtual Machines Using Proxmox
Setting up a home server is not just a fun learning adventure into system administration, but it can also transform into an incredibly handy tool. Proxmox can help enhance this experience by allowing you to create and manage virtual machines for your server. Recently I set up a new desktop PC to serve as my home server and choosing to use Proxmox for the OS was a no brainer.
What's the Point of Creating a Server?
Running your own server at home opens up the door to tons of different utilities. You don't always have to rely on our tech overlords like Google/Facebook/Amazon when you have your own cloud. Below are some awesome use cases to look into:
- A media streaming server using Plex or Jellyfin.
- A DNS server for custom local DNS domains and network adblocking, using Pi-hole.
- Network-attached storage for data storage and convenient sharing across all my devices using TrueNAS.
- Hosting dedicated servers for online games like Minecraft, Counter-Strike, Terraria, and more.
Prerequisites
Here's what you'll need to get started:
- A spare computer. It doesn't have to be a powerhouse—starting on an old laptop and then upgrading to something more robust later will suffice.
- Some form of external media storage such as a USB flash drive.
**If the system's performance is too sluggish or lacks sufficient RAM for creating more than one virtual machine, I'd recommend installing a server OS directly—like Ubuntu server—and managing your services using Docker.
Getting the ball rolling
- Visit Proxmox's website and download the latest Proxmox VE ISO.
- Flash the ISO onto your external drive using a simple tool like balenaEtcher.
- Connect your external drive to the machine that will be transformed into your home server.
- Turn on your machine and access the boot menu—this is usually triggered by pressing a function key like F11 during boot. Look up how to boot from a USB for your specific machine.
- Choose the 'boot from USB' option, and proceed to select the drive that you've connected.
- This should land you at the Proxmox installer. Here, you just follow a few straightforward steps to configure your operating system.
What's next?
Once Proxmox is installed on your machine, you'll have access to the web UI from any other device on your local network. Simply enter the local IP of your server into your browser, followed by the default Proxmox port (8006).
If you're unsure about the local IP of your server, simply input ip a into your server's terminal to discover it. It should be something along the lines of 192.168.1.XX, and consequently, you'll type 192.168.1.XX:8006 into your browser.
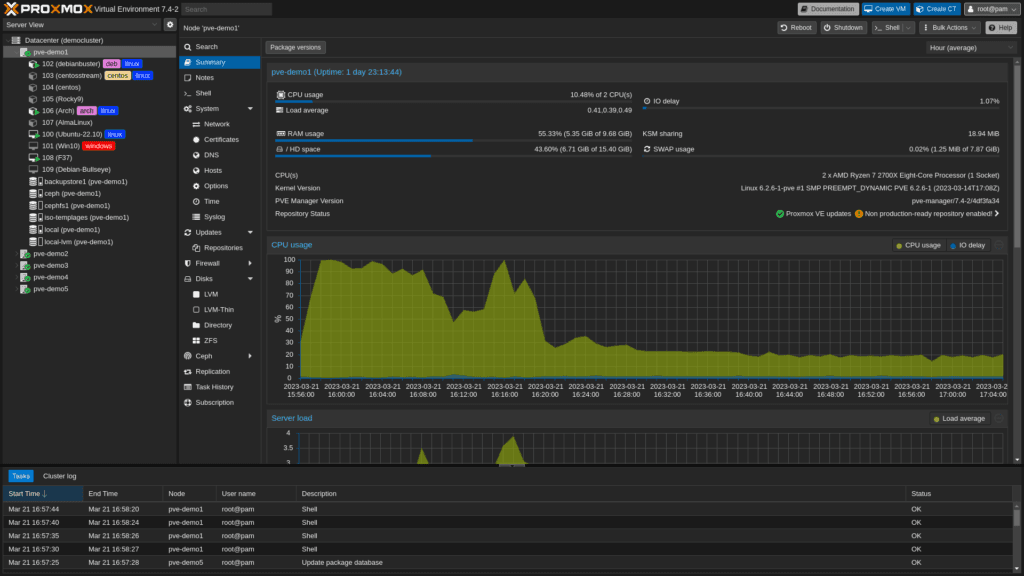
The web UI serves as a powerful interface that'll aid you in setting up your server and its services. From here, you can create and manage virtual machines, run Docker containers on Proxmox using LXCs, install NAS software like TrueNAS, and much more.